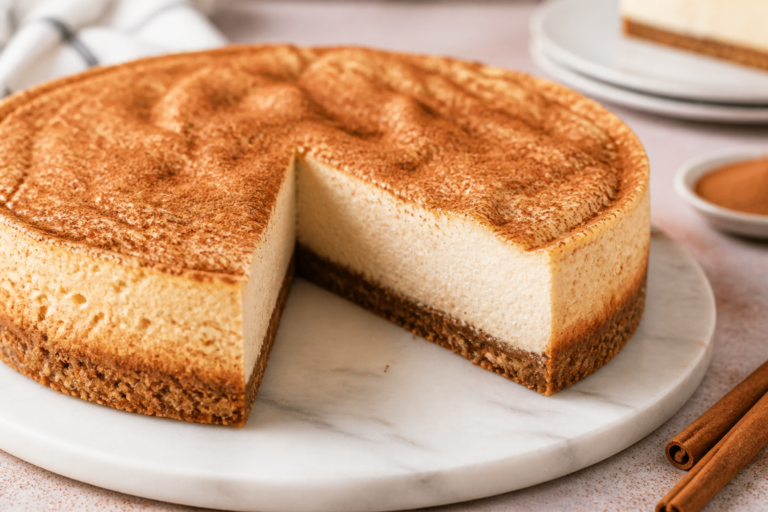
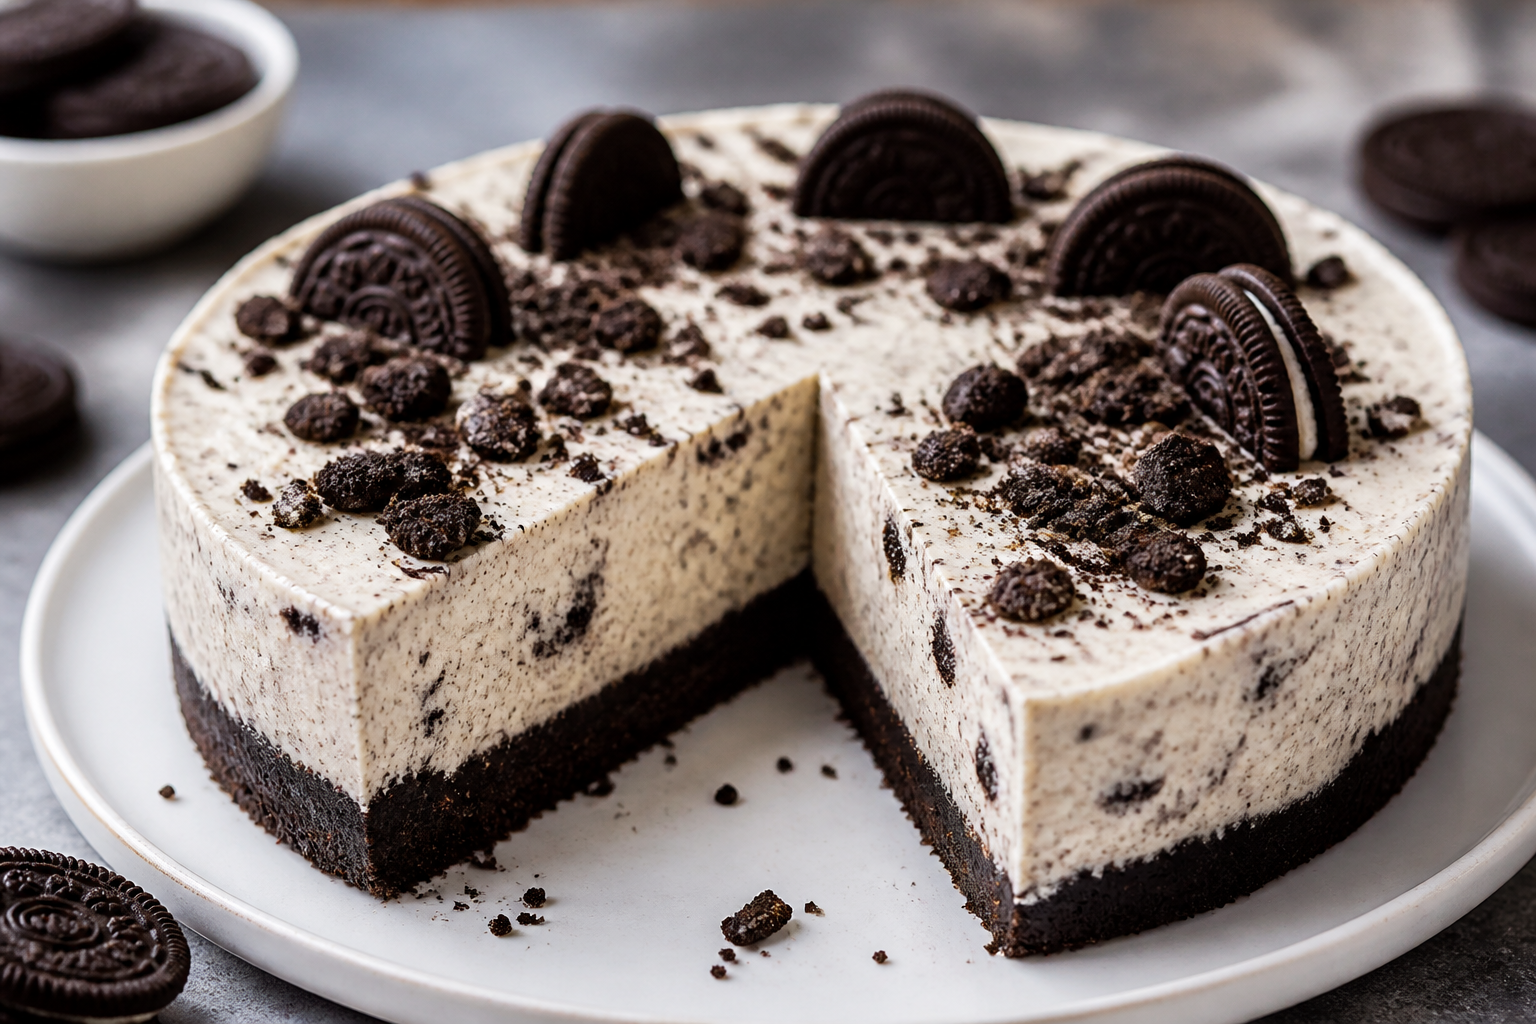
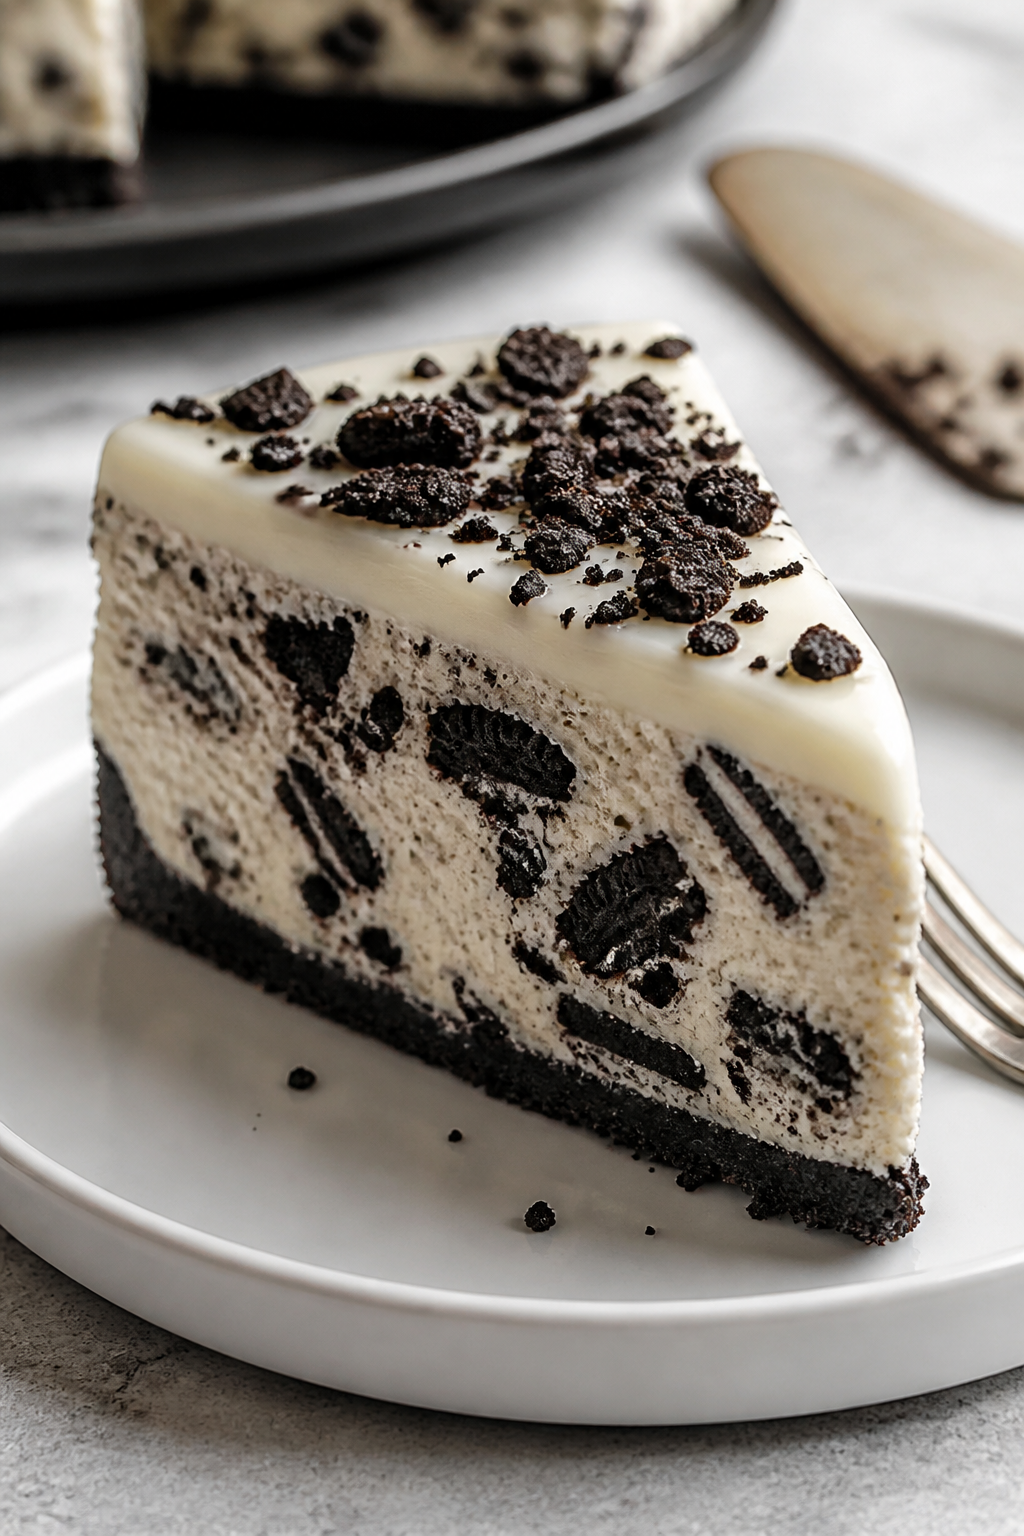
High Protein Cookies and Cream Cheesecake – A Lighter Take on a Classic Dessert
This cheesecake keeps all the creamy, dreamy goodness of the original but packs in a serious protein boost. It’s the kind of dessert you can slice into on a weeknight and still feel good about. The texture is rich and smooth, the flavor is classic cookies and cream, and the sweetness is balanced—not cloying.
Whether you’re tracking macros or just want a more satisfying treat, this one hits the spot.
High Protein Cookies and Cream Cheesecake - A Lighter Take on a Classic Dessert
Ingredients
Method
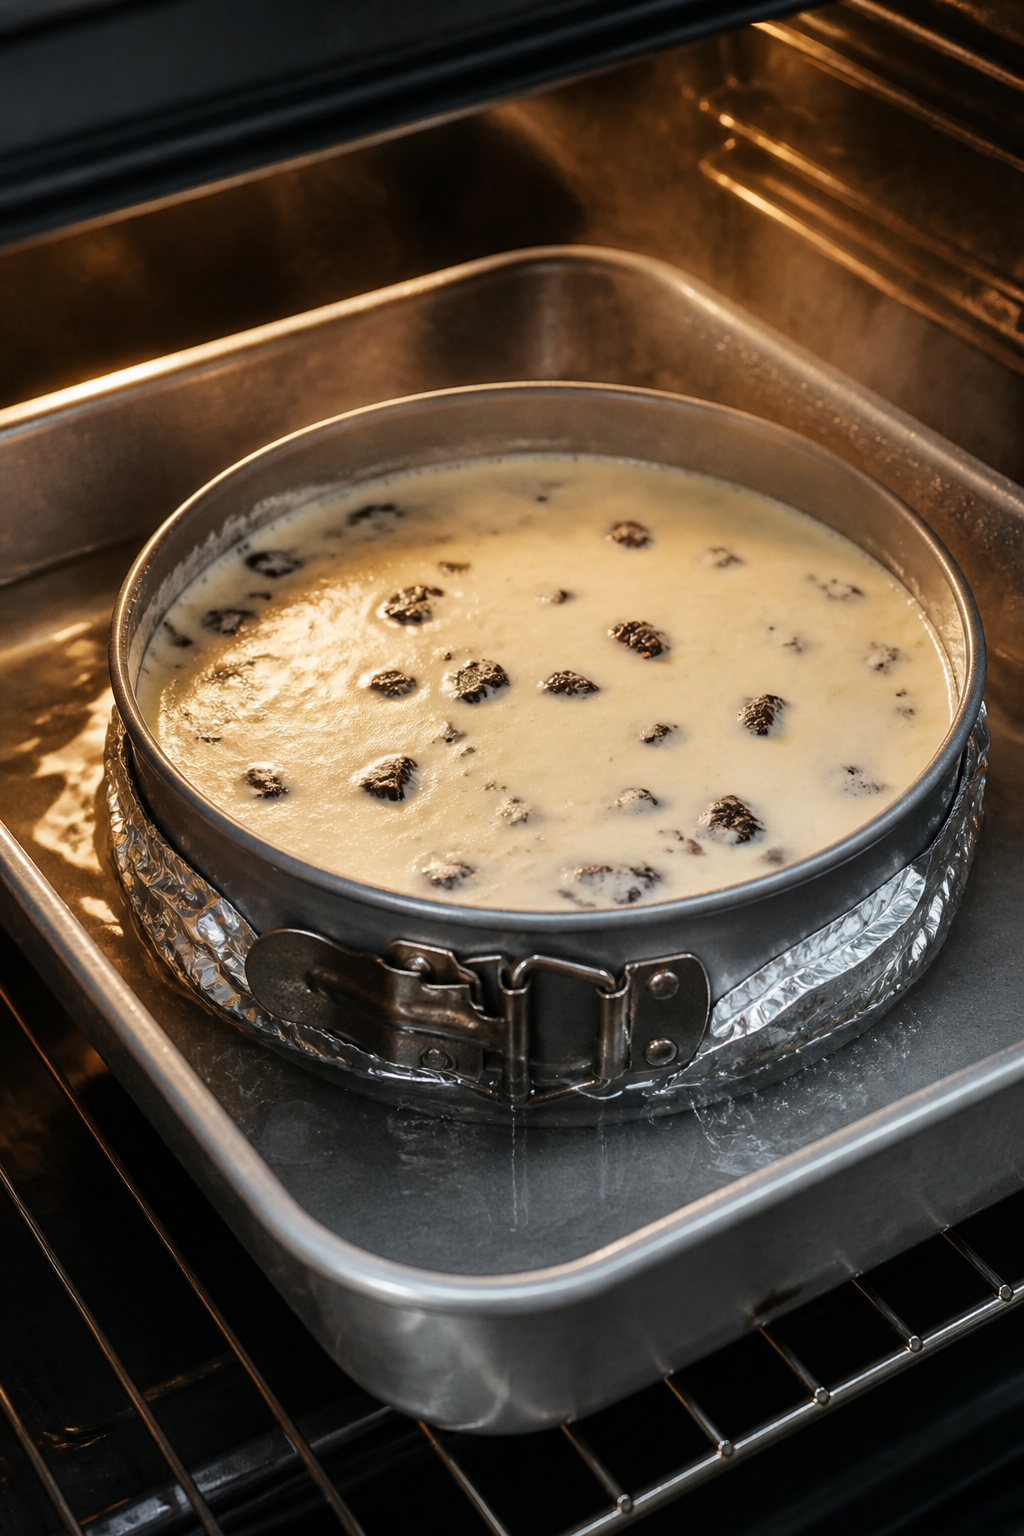
- Prep the pan: Wrap the outside of a 9-inch springform pan with two layers of heavy-duty foil, sealing the bottom and sides. Lightly grease the inside. Preheat oven to 325°F (165°C).
- Make the crust: Pulse cookies to fine crumbs. Add melted butter and a pinch of salt; pulse until the texture resembles wet sand. Press firmly into the bottom of the pan. Bake for 8 minutes, then cool slightly.
- Warm the dairy: Let cream cheese and yogurt sit at room temp 30–45 minutes. This prevents lumps and overmixing later.
- Mix the filling base: In a large bowl, beat cream cheese on medium-low until smooth, about 1 minute. Add sweetener blend, sugar, salt, and cornstarch; mix just until combined, scraping the bowl.
- Add yogurt and vanilla: Beat in Greek yogurt and vanilla on low until smooth. Avoid whipping too much air into the batter.
- Incorporate protein: Whisk protein powder to break up clumps, then add to the bowl. Mix on low until fully blended and satiny.
- Add eggs: Beat in eggs and egg whites one at a time on low, mixing just until incorporated. Stop when the batter is uniform and glossy.
- Fold in cookies: Gently fold chopped cookies into the batter with a spatula. Don’t over-stir or the crumbs will gray out the filling.
- Set up the water bath: Place the foil-wrapped pan in a large roasting pan. Pour the filling over the crust and smooth the top. Carefully add hot water to the roasting pan to reach halfway up the sides of the springform.
- Bake: Bake at 325°F (165°C) for 50–60 minutes. The edges should be set and the center should wobble slightly like gelatin.
- Cool gradually: Turn off the oven, crack the door, and let the cheesecake rest inside for 45 minutes. Remove from the bath, discard foil, and cool to room temperature.
- Chill: Cover and refrigerate at least 6 hours, preferably overnight, to fully set and develop flavor.
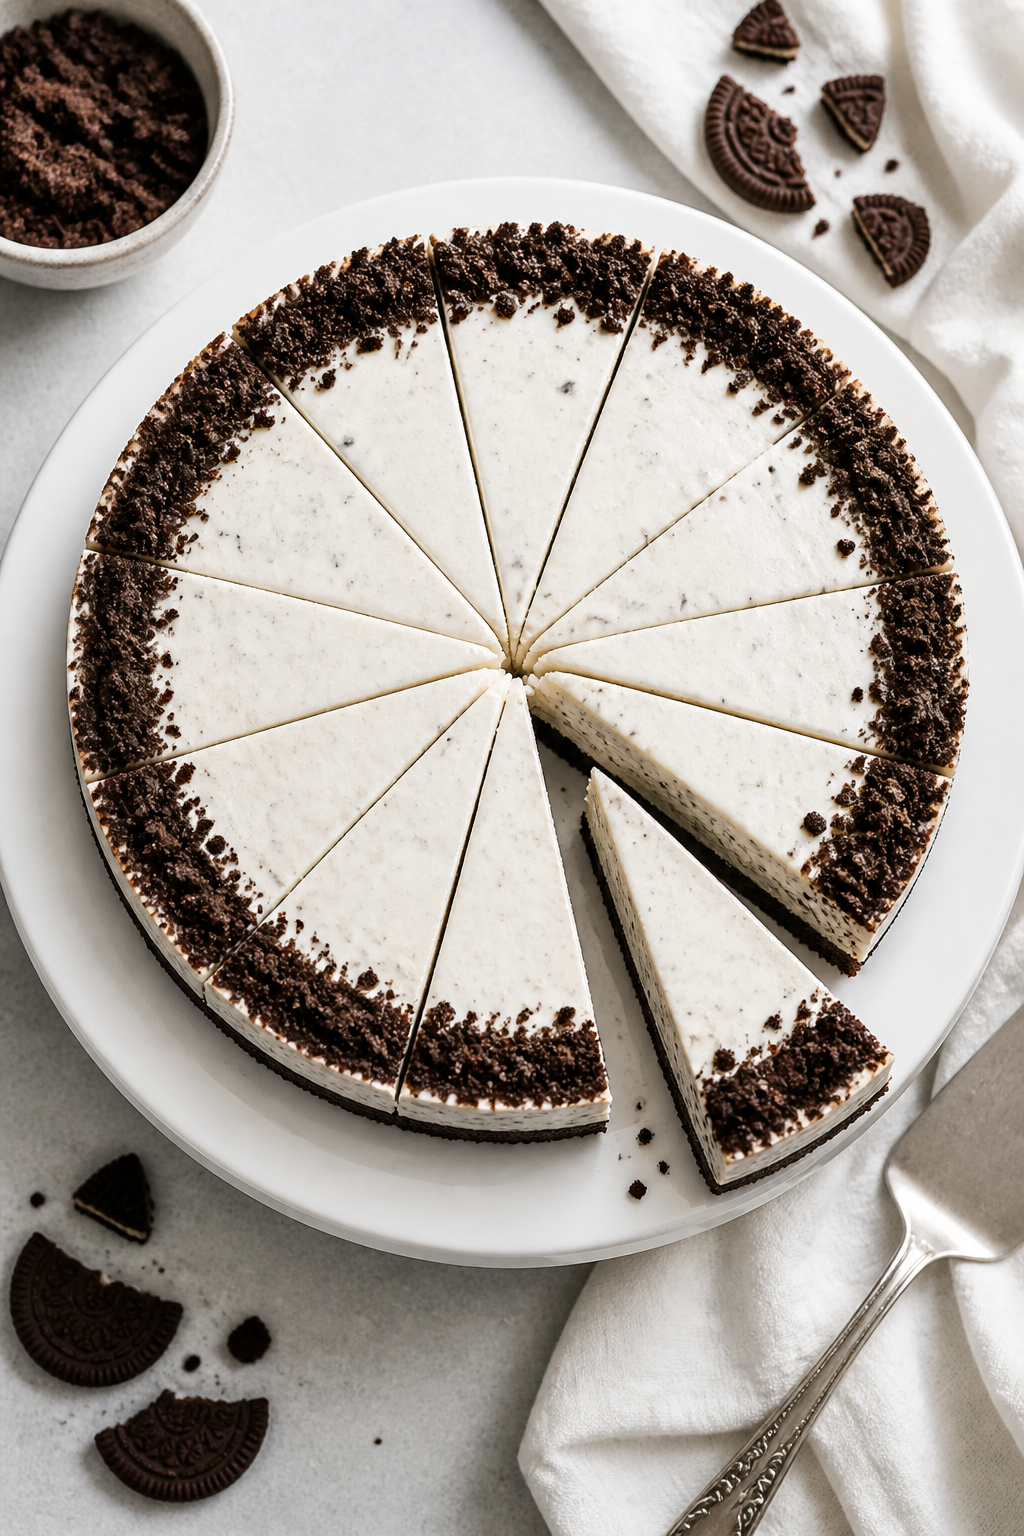
- Optional topping: Stir yogurt, powdered sweetener, and vanilla. Spread a thin layer over the chilled cheesecake and add a few crushed cookies for a clean cookies-and-cream look.
- Slice and serve: Run a thin knife around the edge before unclipping the pan. Use a hot, clean knife for neat slices.
Why This Recipe Works
- Protein without the chalky taste: Greek yogurt and light cream cheese keep it creamy while whey or casein powder blends in seamlessly.
- Lower sugar, full flavor: A mix of a little real sugar and a zero-calorie sweetener gives you sweetness without heaviness.
- No-fuss crust: Lightened chocolate sandwich cookies create a crisp, familiar base with minimal butter.
- Gentle bake: A low oven and water bath method reduce cracks and keep the filling silky.
- Make-ahead friendly: Chills beautifully and tastes even better the next day.
What You’ll Need
- For the crust:
- 18–20 chocolate sandwich cookies (regular or light, about 200 g)
- 3 tablespoons unsalted butter, melted
- 1 pinch fine sea salt
- For the filling:
- 16 ounces (450 g) light cream cheese, softened to room temperature
- 1 cup (240 g) 2% Greek yogurt, room temperature
- 2 large eggs, room temperature
- 1/2 cup (120 ml) liquid egg whites or 2 additional egg whites
- 1/2 cup (40–50 g) vanilla or unflavored whey/casein blend protein powder
- 1/2 cup (100 g) granulated sweetener blend (e.g., 1:1 erythritol/monk fruit) plus 2 tablespoons regular sugar
- 1 tablespoon cornstarch or vanilla pudding mix
- 1 1/2 teaspoons vanilla extract
- 1/4 teaspoon fine sea salt
- 8–10 chocolate sandwich cookies, roughly chopped, plus extra for garnish
- Optional topping:
- 1/2 cup (120 g) 2% Greek yogurt
- 1 tablespoon powdered sweetener
- 1/2 teaspoon vanilla extract
- Equipment:
- 9-inch springform pan
- Food processor or rolling pin and bag
- Stand mixer or hand mixer
- Large roasting pan for water bath
- Heavy-duty foil
How to Make It
- Prep the pan: Wrap the outside of a 9-inch springform pan with two layers of heavy-duty foil, sealing the bottom and sides. Lightly grease the inside. Preheat oven to 325°F (165°C).
- Make the crust: Pulse cookies to fine crumbs.
Add melted butter and a pinch of salt; pulse until the texture resembles wet sand. Press firmly into the bottom of the pan. Bake for 8 minutes, then cool slightly.
- Warm the dairy: Let cream cheese and yogurt sit at room temp 30–45 minutes.
This prevents lumps and overmixing later.
- Mix the filling base: In a large bowl, beat cream cheese on medium-low until smooth, about 1 minute. Add sweetener blend, sugar, salt, and cornstarch; mix just until combined, scraping the bowl.
- Add yogurt and vanilla: Beat in Greek yogurt and vanilla on low until smooth. Avoid whipping too much air into the batter.
- Incorporate protein: Whisk protein powder to break up clumps, then add to the bowl.
Mix on low until fully blended and satiny.
- Add eggs: Beat in eggs and egg whites one at a time on low, mixing just until incorporated. Stop when the batter is uniform and glossy.
- Fold in cookies: Gently fold chopped cookies into the batter with a spatula. Don’t over-stir or the crumbs will gray out the filling.
- Set up the water bath: Place the foil-wrapped pan in a large roasting pan.
Pour the filling over the crust and smooth the top. Carefully add hot water to the roasting pan to reach halfway up the sides of the springform.
- Bake: Bake at 325°F (165°C) for 50–60 minutes. The edges should be set and the center should wobble slightly like gelatin.
- Cool gradually: Turn off the oven, crack the door, and let the cheesecake rest inside for 45 minutes.
Remove from the bath, discard foil, and cool to room temperature.
- Chill: Cover and refrigerate at least 6 hours, preferably overnight, to fully set and develop flavor.
- Optional topping: Stir yogurt, powdered sweetener, and vanilla. Spread a thin layer over the chilled cheesecake and add a few crushed cookies for a clean cookies-and-cream look.
- Slice and serve: Run a thin knife around the edge before unclipping the pan. Use a hot, clean knife for neat slices.
Storage Instructions
- Refrigerator: Cover tightly and store up to 5 days.
Keep it on a flat shelf, not the door, for steady temperature.
- Freezer: Freeze whole or in slices. Wrap in plastic, then foil, and freeze up to 2 months. Thaw overnight in the fridge.
- Make-ahead: Bake one to two days early for best texture and an easier release from the pan.
Why This is Good for You
- Protein-packed: Greek yogurt, egg whites, and protein powder bump up protein, which keeps you fuller longer.
- Balanced macros: Compared to traditional cheesecake, this version typically has fewer calories and less sugar per slice.
- Smarter sweetness: A blend of real sugar and zero-calorie sweetener means better flavor with less overall sugar.
- Satisfying fats: Light cream cheese gives you creamy texture with fewer saturated fat grams than full-fat versions.
What Not to Do
- Don’t overmix: Too much air creates cracks and a spongy texture.
- Don’t skip room temperature dairy: Cold ingredients lead to lumps and overbeating.
- Don’t bake too hot: High heat causes puffing and deep cracks.
Stick to 325°F and a water bath.
- Don’t cut warm: Slicing before a full chill will give you messy edges and a loose center.
- Don’t overload cookies: More isn’t always better. Too many will draw moisture and make the filling grainy.
Recipe Variations
- Chocolate Protein Twist: Use chocolate protein powder and add 2 tablespoons cocoa powder to the filling.
- Mint Cookies and Cream: Add 1/2 teaspoon peppermint extract and use mint chocolate cookies for a refreshing finish.
- Gluten-Free: Swap in gluten-free sandwich cookies and verify your protein powder is gluten-free.
- No-Bake Option: Use the same crust, chill it, then fold 2 teaspoons gelatin (bloomed and dissolved) into the filling. Chill 8 hours.
- Single-Serve Minis: Press crust into a lined muffin tin, bake 5 minutes, fill, and bake 16–18 minutes.
- Higher Protein Bump: Replace 1/2 cup yogurt with 1/2 cup low-fat cottage cheese, well blended.
FAQ
Can I use fat-free cream cheese?
Fat-free cream cheese tends to be gummy and can weep after baking.
For the best texture, use light or reduced-fat cream cheese. It’s still lower calorie but holds structure well.
What protein powder works best?
A whey/casein blend or straight casein gives the smoothest, custard-like texture. Pure whey can be a bit softer.
If using plant protein, reduce the amount slightly and increase yogurt by 2–3 tablespoons to avoid chalkiness.
How do I prevent cracks?
Use room temperature ingredients, avoid overmixing, bake in a water bath, and cool gradually in the oven with the door cracked. If a small crack happens, the yogurt topping or a few cookie crumbs cover it nicely.
Can I cut the sweetener more?
Yes, but leave at least 1/3 cup total sweetener to balance tang and protein powder. Taste the batter before adding eggs and adjust to your preference.
Is the water bath really necessary?
It helps a lot.
The steam and gentle heat keep the filling creamy and reduce cracks. If you skip it, bake at 300°F (150°C) and place a separate pan of hot water on the lower rack to add moisture.
How many servings does this make?
You’ll get 12 standard slices. For snack-size portions, cut into 16 thinner slices and store individually for easy grab-and-go treats.
Can I make it without eggs?
Yes.
Replace eggs with 1/2 cup additional Greek yogurt plus 2 tablespoons cornstarch. The texture will be slightly denser but still creamy.
Final Thoughts
This High Protein Cookies and Cream Cheesecake proves you can have a rich, classic dessert with a smarter ingredient list. It’s creamy, satisfying, and built to fit a more balanced way of eating.
Make it ahead, slice it clean, and enjoy a dessert that actually helps you meet your goals—without feeling like a compromise.
Printable Recipe Card
Want just the essential recipe details without scrolling through the article? Get our printable recipe card with just the ingredients and instructions.