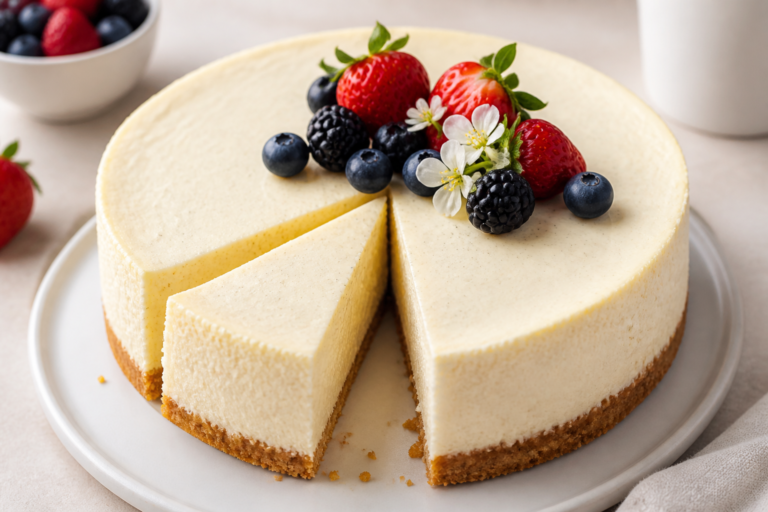
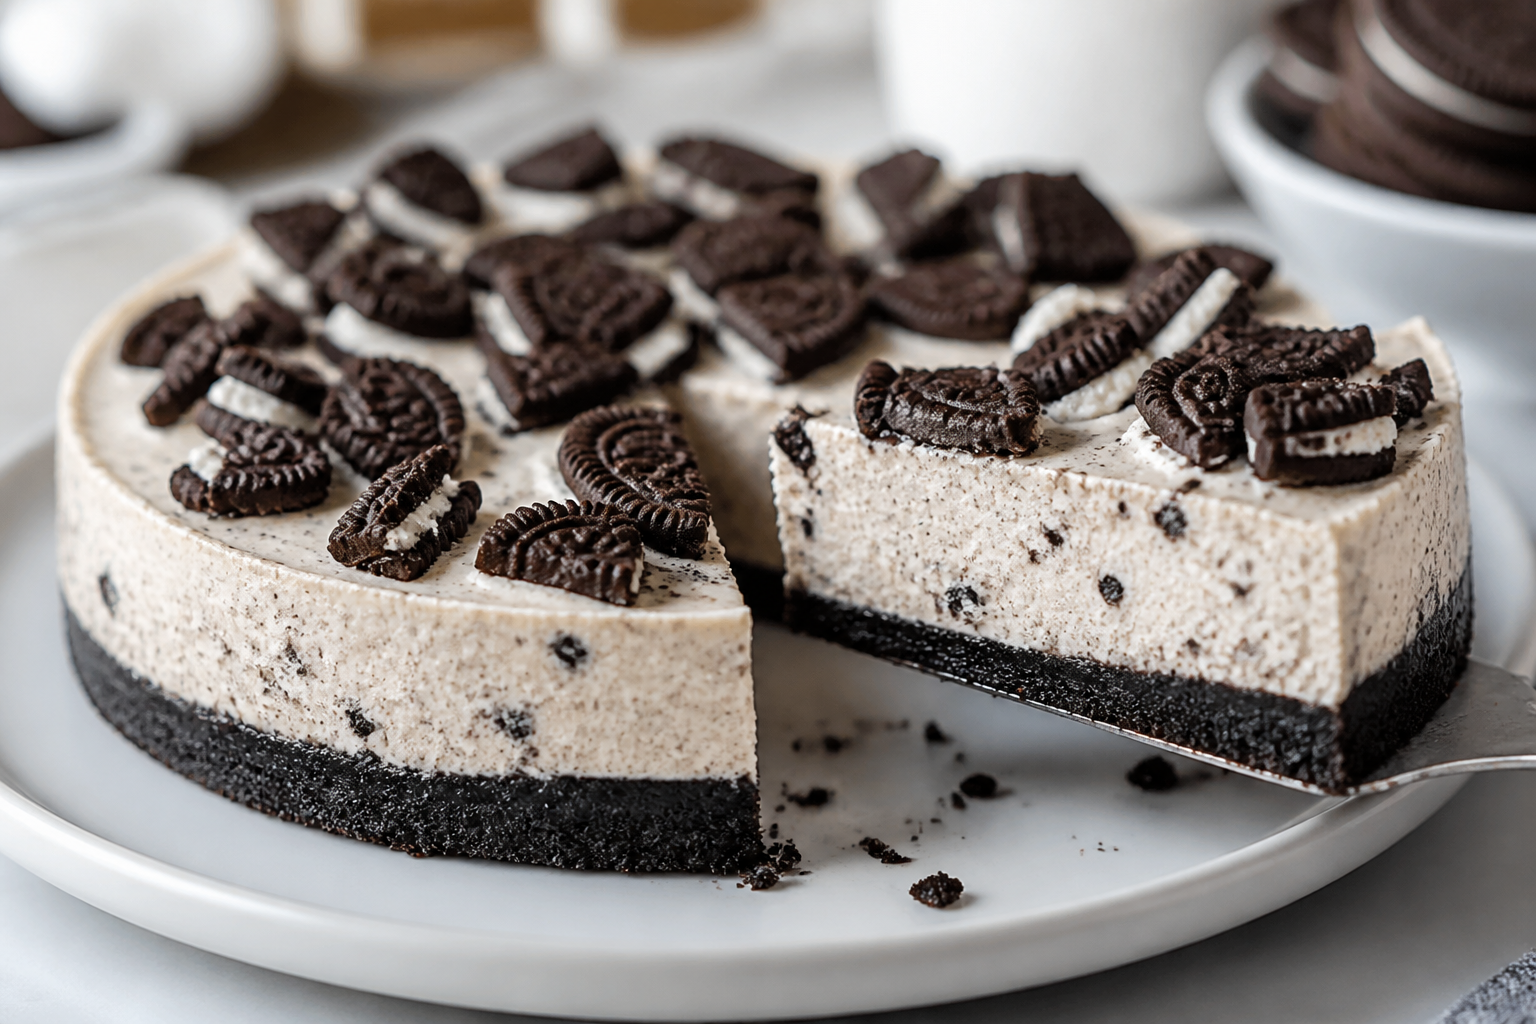
High Protein Oreo Cheesecake – A Lighter Take on a Classic Treat
If you love cookies-and-cream desserts but want something that actually supports your goals, this High Protein Oreo Cheesecake hits the spot. It’s creamy, rich, and full of that classic Oreo flavor—without the sugar crash. You still get the indulgence of cheesecake, but with a balanced macro profile that fits a smarter sweet-tooth strategy.
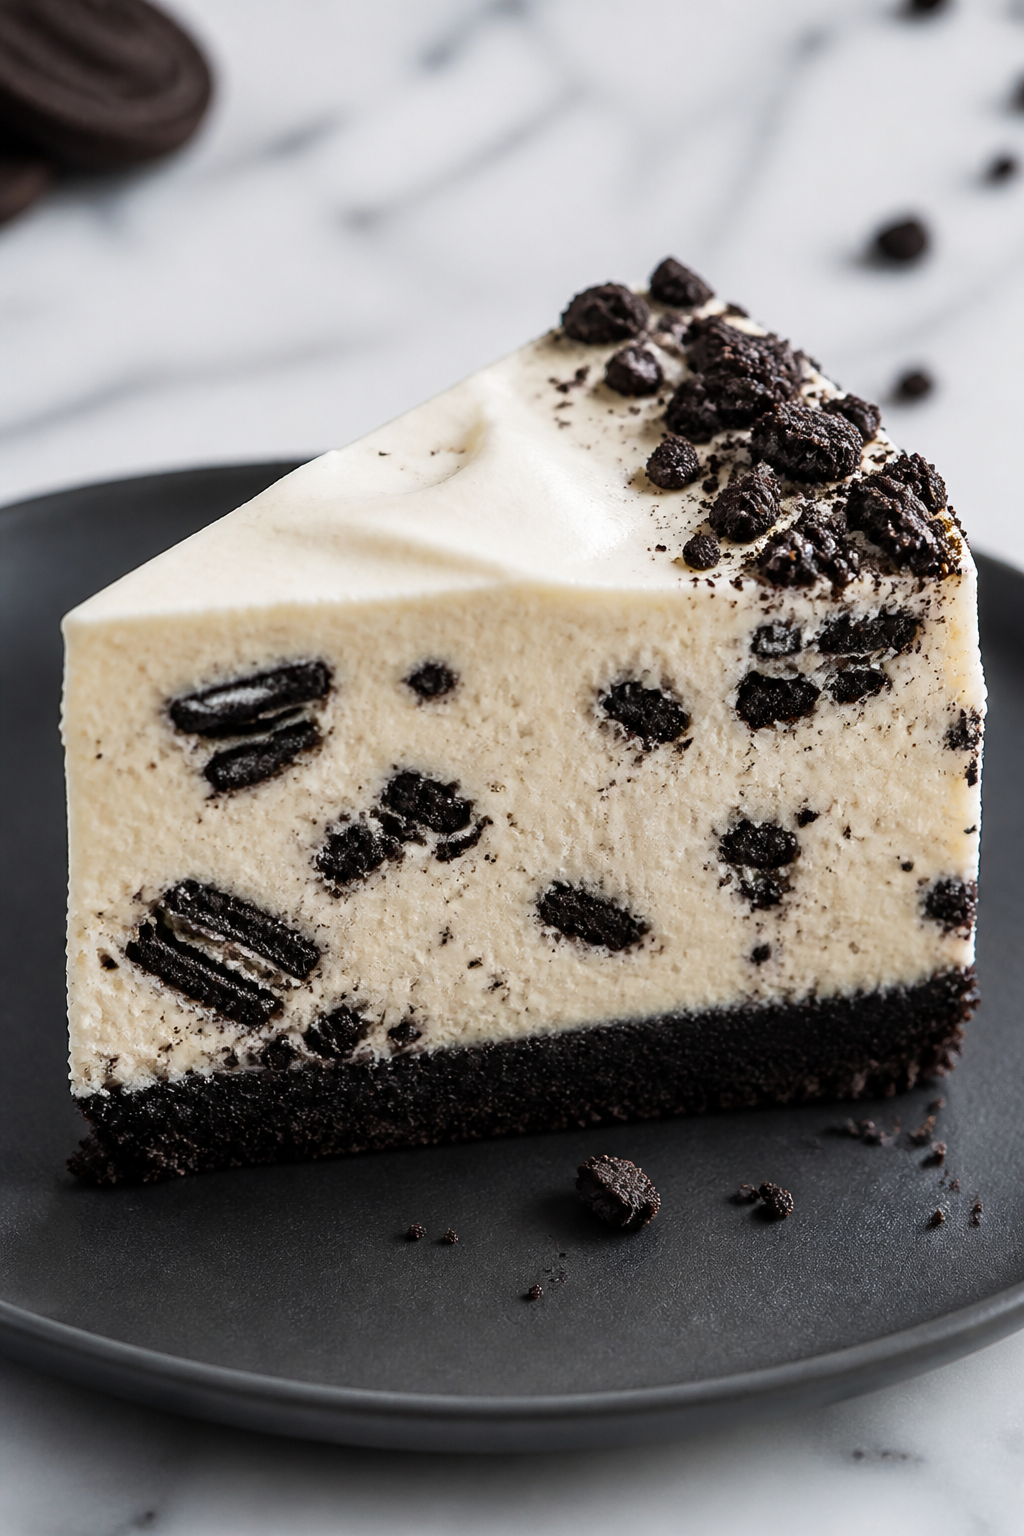
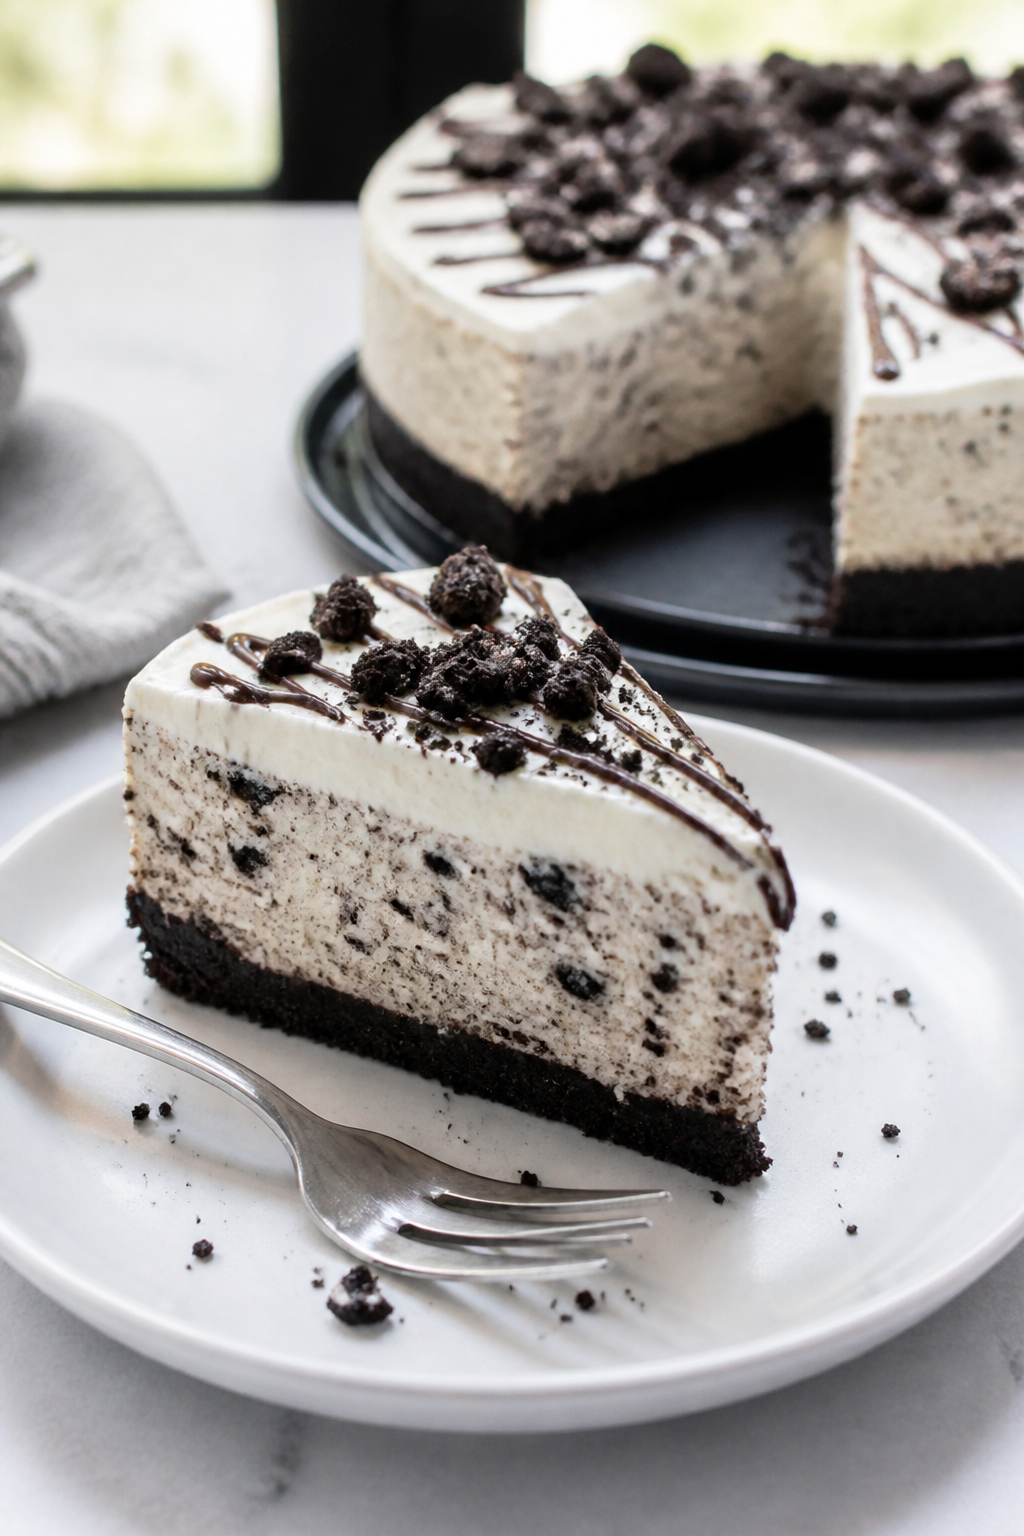
It’s simple enough for a weeknight bake and impressive enough for a special occasion. Expect clean slices, a crunchy cookie base, and a custardy, high-protein filling that tastes like the real deal.
Ingredients
Method
- Prep the pan and oven. Heat oven to 325°F (165°C). Line the bottom of a 9-inch springform pan with parchment. Lightly grease the sides. If using a water bath, wrap the outside of the pan with two layers of foil to prevent leaks.
- Make the crust. In a bowl, combine finely crushed Oreos, melted butter, and a pinch of salt. Mix until the crumbs feel like wet sand.
- Press and par-bake. Press the crumb mixture firmly into the bottom of the pan, pushing slightly up the sides. Use a flat-bottomed glass for an even layer. Bake for 8–10 minutes, then set aside to cool slightly.
- Blend the cream cheese base. In a large bowl, beat the cream cheese on low to medium speed until smooth and no lumps remain, about 1–2 minutes. Scrape down the bowl often to avoid clumps.
- Add yogurt and sugar. Mix in the Greek yogurt and sugar (or substitute) until fully combined. Keep the mixer speed low to limit air bubbles.
- Incorporate protein and dry ingredients. Whisk protein powder, cornstarch, and salt together in a small bowl to break up clumps. Add to the batter and mix on low until just smooth. The cornstarch helps stability and a clean slice.
- Add vanilla and eggs. Beat in vanilla, then add eggs one at a time, mixing on low just until combined after each. Avoid overmixing; too much air leads to cracks.
- Fold in Oreos. Gently fold in the chopped Oreos with a spatula. Don’t crush them too much—larger pieces give a nice cookies-and-cream texture.
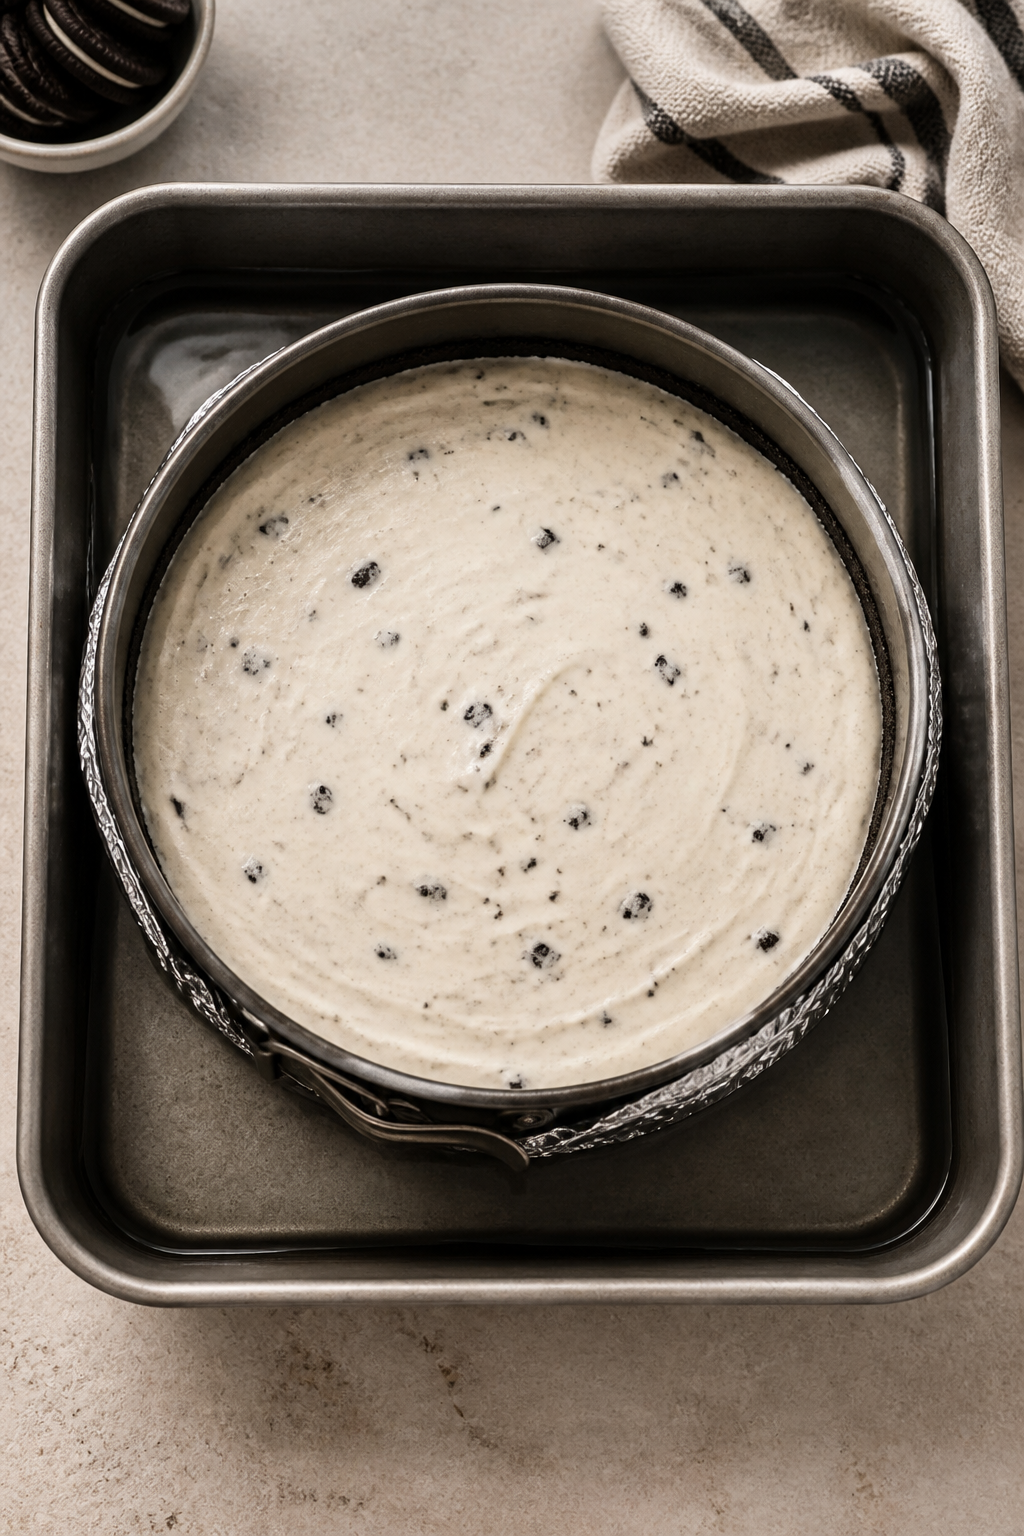
- Pour and settle. Pour batter over the crust. Tap the pan on the counter a few times to release any air bubbles.
- Prepare the water bath (optional but helpful). Place the springform pan into a larger roasting pan. Pour hot water into the roasting pan to come halfway up the sides of the springform. This promotes even baking and prevents cracks.
- Bake low and slow. Bake at 325°F (165°C) for 45–55 minutes. The edges should be set, and the center should still have a slight jiggle, like Jell-O. Avoid overbaking.
- Cool gradually. Turn off the oven, crack the door, and let the cheesecake rest inside for 45 minutes. Then remove from the oven and water bath. Run a thin knife around the edge to loosen. Cool to room temperature for 1 hour.
- Chill to set. Cover and refrigerate for at least 6 hours, but preferably overnight. This step fully sets the proteins and improves flavor.
- Add optional topping. Spread the sweetened Greek yogurt over the chilled cheesecake and finish with crushed Oreos. Slice with a hot, clean knife for neat cuts.
What Makes This Special
This recipe turns a decadent dessert into a more balanced option by using Greek yogurt and protein powder in the filling. You still keep that familiar Oreo crust, but the overall sugar and fat are trimmed without sacrificing texture.
It bakes low and slow to avoid cracks and dryness, and cools in stages for the best set. The end result is a cheesecake that’s creamy, sturdy, and satisfying—with a noticeable protein boost.
What You’ll Need
- For the crust:
- 18 Oreo cookies (about 200 g), finely crushed
- 3 tablespoons unsalted butter, melted
- 1 pinch salt
- For the filling:
- 16 oz (450 g) light cream cheese, room temperature
- 1 cup (240 g) 2% Greek yogurt, room temperature
- 3 large eggs, room temperature
- 1/2 cup (100 g) granulated sugar or 1:1 sugar substitute
- 1/3 cup (35–40 g) vanilla whey or casein protein powder
- 1 teaspoon pure vanilla extract
- 1 tablespoon cornstarch
- 1/4 teaspoon fine salt
- 8 Oreo cookies, roughly chopped
- For topping (optional):
- 1/2 cup (120 g) 2% Greek yogurt mixed with 1 tablespoon powdered sugar
- 2–3 crushed Oreos for garnish
- Equipment:
- 9-inch (23 cm) springform pan
- Mixing bowls and hand mixer (or stand mixer)
- Rubber spatula
- Aluminum foil (for wrapping the pan if using a water bath)
- Baking sheet or roasting pan (for water bath)
Step-by-Step Instructions
- Prep the pan and oven. Heat oven to 325°F (165°C). Line the bottom of a 9-inch springform pan with parchment.
Lightly grease the sides. If using a water bath, wrap the outside of the pan with two layers of foil to prevent leaks.
- Make the crust. In a bowl, combine finely crushed Oreos, melted butter, and a pinch of salt. Mix until the crumbs feel like wet sand.
- Press and par-bake. Press the crumb mixture firmly into the bottom of the pan, pushing slightly up the sides.
Use a flat-bottomed glass for an even layer. Bake for 8–10 minutes, then set aside to cool slightly.
- Blend the cream cheese base. In a large bowl, beat the cream cheese on low to medium speed until smooth and no lumps remain, about 1–2 minutes. Scrape down the bowl often to avoid clumps.
- Add yogurt and sugar. Mix in the Greek yogurt and sugar (or substitute) until fully combined.
Keep the mixer speed low to limit air bubbles.
- Incorporate protein and dry ingredients. Whisk protein powder, cornstarch, and salt together in a small bowl to break up clumps. Add to the batter and mix on low until just smooth. The cornstarch helps stability and a clean slice.
- Add vanilla and eggs. Beat in vanilla, then add eggs one at a time, mixing on low just until combined after each.
Avoid overmixing; too much air leads to cracks.
- Fold in Oreos. Gently fold in the chopped Oreos with a spatula. Don’t crush them too much—larger pieces give a nice cookies-and-cream texture.
- Pour and settle. Pour batter over the crust. Tap the pan on the counter a few times to release any air bubbles.
- Prepare the water bath (optional but helpful). Place the springform pan into a larger roasting pan.
Pour hot water into the roasting pan to come halfway up the sides of the springform. This promotes even baking and prevents cracks.
- Bake low and slow. Bake at 325°F (165°C) for 45–55 minutes. The edges should be set, and the center should still have a slight jiggle, like Jell-O.
Avoid overbaking.
- Cool gradually. Turn off the oven, crack the door, and let the cheesecake rest inside for 45 minutes. Then remove from the oven and water bath. Run a thin knife around the edge to loosen.
Cool to room temperature for 1 hour.
- Chill to set. Cover and refrigerate for at least 6 hours, but preferably overnight. This step fully sets the proteins and improves flavor.
- Add optional topping. Spread the sweetened Greek yogurt over the chilled cheesecake and finish with crushed Oreos. Slice with a hot, clean knife for neat cuts.
How to Store
- Refrigerator: Store covered in the springform pan or an airtight container for up to 5 days.
- Freezer: Freeze individual slices wrapped tightly in plastic, then foil, for up to 2 months.
Thaw overnight in the fridge.
- Best texture tip: For clean slices after chilling, let the cake sit at room temperature for 10–15 minutes before serving.
Health Benefits
This cheesecake offers a higher protein-to-calorie ratio than traditional versions. Greek yogurt and protein powder boost protein for satiety and muscle repair. Light cream cheese and moderated sugar help reduce overall calories while keeping the dessert creamy.
You still get the joy of a classic treat, but in a format that can fit into a balanced diet.
Protein helps curb cravings and supports recovery if you’re active. Pairing dessert with protein also slows digestion slightly, which may help maintain steadier energy levels. It’s a smart swap when you want something sweet without going overboard.
Pitfalls to Watch Out For
- Overbaking: If the center is fully set in the oven, it’s overdone and can turn dry or grainy.
Pull it when it still wobbles slightly.
- Skipping room temperature ingredients: Cold cream cheese clumps and creates a lumpy batter. Give everything 30–45 minutes on the counter.
- Too much air: High mixer speed incorporates air, which leads to cracks. Keep mixing on low and scrape the bowl often.
- Leaky water bath: If you use a water bath, double-wrap the pan in foil or use a silicone wrap to prevent soggy crust.
- Wrong protein powder type: Some powders can turn gummy.
A blend or casein adds creaminess; whey isolate can be drier, so don’t overdo it.
Alternatives
- Crust swaps: Use chocolate graham crackers or a high-fiber chocolate cookie if you want fewer added sugars. Gluten-free chocolate sandwich cookies work well too.
- Dairy tweaks: Swap light cream cheese with Neufchâtel for a similar texture. For dairy-sensitive guests, try lactose-free cream cheese and yogurt.
- Sweeteners: Erythritol/monk fruit blends or allulose can replace sugar 1:1.
Allulose browns less and tastes smooth; adjust to taste.
- Flavor twists: Add 1 teaspoon espresso powder for deeper chocolate notes, or swirl in 2 tablespoons warm peanut butter for a peanut butter Oreo vibe.
- Topping ideas: Skip the yogurt topping and add a light drizzle of melted dark chocolate or a few raspberries for brightness.
FAQ
Can I make this without a water bath?
Yes. Bake at the same temperature but place a pan of hot water on a lower rack for humidity. Watch closely to avoid overbaking, and cool slowly to prevent cracks.
What’s the best protein powder to use?
A casein or whey-casein blend works best for creaminess and stability.
If using whey isolate, keep it to about 1/3 cup and don’t pack it; too much can make the texture spongy.
How do I prevent cracks on top?
Use room temperature ingredients, mix on low, bake gently, and cool slowly with the oven door cracked. Running a knife around the edge right after baking also reduces tension as it cools.
Can I make it ahead?
Absolutely. Cheesecake improves after a full night in the fridge.
You can bake it up to 2 days in advance and add the topping just before serving.
How many servings does this make?
A 9-inch cheesecake yields about 12 slices. For smaller portions, cut into 16 slices; the texture holds up well even in thinner wedges.
Is this actually high in protein?
Compared to traditional cheesecake, yes. With Greek yogurt and protein powder, each slice can land around 12–18 grams of protein depending on brands and slice size.
Check your labels for exact numbers.
Can I use fat-free cream cheese or yogurt?
You can, but the texture will be less creamy and more chalky. A 2% or light option strikes the best balance between taste, structure, and calories.
In Conclusion
This High Protein Oreo Cheesecake gives you the best of both worlds: the comfort of a classic dessert and a macro-friendly twist that doesn’t taste “healthy.” The method is simple, the ingredients are easy to find, and the results are consistently reliable. Whether you’re meal-prepping snacks or planning a celebration, this cheesecake fits the moment—and your goals.
Slice, share, and enjoy the cookies-and-cream flavor with a little extra staying power.
Printable Recipe Card
Want just the essential recipe details without scrolling through the article? Get our printable recipe card with just the ingredients and instructions.